Tutorials
NanoVer tutorials
This section provides tutorials on getting started with NanoVer. We assume familiarity with setting up simulations in whichever framework you’re running with NanoVer. Choose from the following sets of tutorials:
Our tutorials can be used in conjunction with our iMD-VR application, NanoVer iMD-VR, see the instructions for Installing the iMD-VR client.
Important
Our tutorials are provided as Jupyter notebooks, and thus require Jupyter to run.
Some of our notebooks also use NGLView for visualising simulations.
Both jupyterlab and nglview are installed automatically when you install nanover-server.
Tips for using NanoVer in Jupyter
NanoVer provides a set of libraries that define a range of objects (classes, functions, etc.) that can be used to perform interactive molecular dynamics simulations. The Jupyter notebook interface provides useful tools to navigate these libraries and their functionality, making it easier to find the resources you need without digging through the documentation.

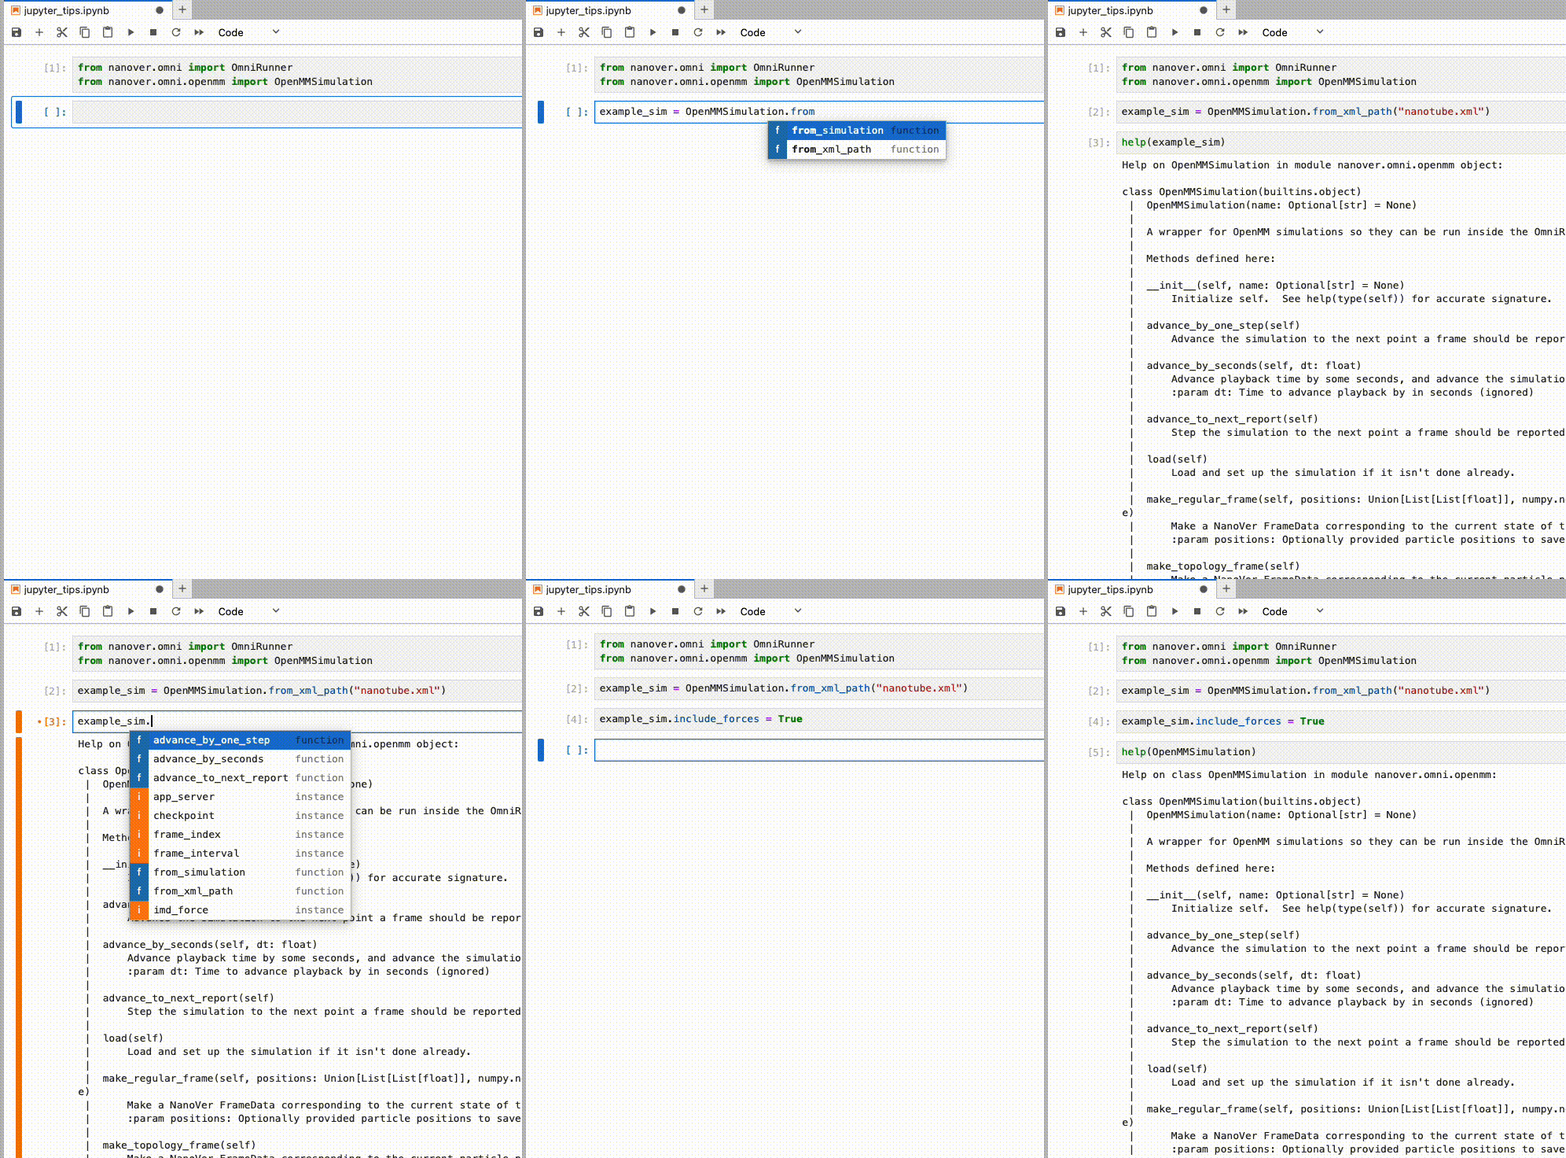
The GIF above demonstrates how to use Jupyter to explore and understand objects in NanoVer:
Use ⇥ (the Tab key) mid-way through typing to list options such as available functions within a class and select the desired option for autocompletion:
e.g. selecting the
OpenMMSimulation.from_xml_path()function for importing simulation filesUse ⇥ to list the functionality of objects:
e.g. pressing ⇥ after typing
example_sim.to see the functionality associated with this instanceUse the
help()function to get information about objects, which can be used onInstances of objects (e.g.
example_sim)The objects themselves (e.g.
OpenMMSimulation)
Both ⇥ and help() provide useful information about the objects and their functionality. When using ⇥, the
object’s type is displayed next to it, making it easy to tell which functions, instances etc. are available to
a particular object.
The help() function prints the docstrings associated with the object, which can also be found in the
modules section of this documentation.
Further reading
For more details, look at the documentation for the individual modules.